Builder gel is a new gel enhancement formula preferred by many professionals and DIYers. Yet, can you use builder gel as nail glue?
Builder gel has gained considerable traction among nail techs and is now widely used to create many salon manicures.
It is essential to understand how the nail glue and gel builder work and their main applications to decide whether they can be used interchangeably and, if yes, on what type of application.
Nail Glue vs Builder Gel
What Is Nail Glue?
Nail glues are mostly used as an adhesive for artificial nails, wraps, tips, and acrylics to stick to natural nails. Besides, they provide fake nails with more strength and durability so that they can be shaped and filed to your liking.
Nail glues are specifically made to dry fast and adhere securely to the nails. They are also waterproof and turn clear after drying.
The key ingredient in nail glue is cyanoacrylate, which is the same chemical used in various types of household super glues.
While there are undeniable benefits, nail glues might cause allergic reactions to some people.
Others also express their concerns over the detrimental implications of harsh chemicals in nail glue, which can damage and weaken the nails over time.
For these reasons, many users are seeking an alternative to nail glue for their at-home manicure, and gel builder looks like a promising candidate.
What Is Builder Gel?
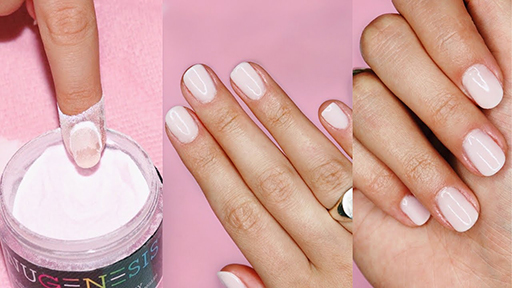
Builder gel is medium to thick viscosity, odorless, and strong gel usually used to add strength, length, and thickness to natural nails.
Though this gel type is a new arrival in the world of manicure, it has taken over nail salons and directly competes against older nail techniques such as acrylic, poly gel, and dipping (SNS).
Builder gel is highly flexible. Despite the thinner formula, the product can obtain superior strength and durability. Thanks to this flexibility, builder gel can be used either directly on natural nails or to build nail extensions.
- Natural nails
When applied straight on natural nails, builder gel’s main job is to boost the strength of the weak nails and allow them to grow better.
Since builder gel also tends to self-level, it can act as a ridge filler to smooth out any bumps and ridges on your natural nails and bring out a smoother foundation layer.
In addition, it can be used as a structural base coat, which is incredibly stronger than a regular gel base coat and possesses a much thicker consistency than a regular base coat.
- Nail Extensions
A gel builder has sufficient strength to build an extension with either fake tips or sculpting forms.
The gel is supposed to be laid over the fake tips and the entire nail plates. You can also re-fill or overlay your existing nail extensions with a builder gel.
This nail tech requires minimal filing, and thus it is less damaging to the nails, and you can get your nails done faster.
Owing to its superior adhesive strength, it can be used for long extensions, so possibilities on how to extend, shape, and decorate your nails are virtually endless here!
As mentioned, builder gel does not produce strong, harsh fumes, so it’s safer on both you and the nail tech, especially when compared with acrylics.
It’s worth mentioning that builder gel is UV/LED curable, which means that you need to spend time curing it.
However, the removal is quite straightforward and can be done at home, as this gel completely soaks off in acetone.
Can You Use Builder Gel As Nail Glue?
Yes, you can use builder gel as an alternative to nail glue to extend your nails. The builder gel is strong enough for the extensions to hang on, so you can use it in place of nail glue for nail extensions.
Builder gel is perfect for any length of the extension and also easy-going to go with either tips or forms. So if you’re a long nail lover and looking for an alternative to nail glue, builder gels can fit the bill!
An extension using a builder can last for around 2-3 weeks. The longevity depends on various factors, including the quality of the gel itself, the level of oil your nails produce, how well you prep your nails, how you apply the nails and tips, and the amount of time for curing.
Maintenance and lifestyle are also in play here, as extended exposure to the water and heat or physical impacts can make the gel pop off much quicker than expected.
How To Extend Your Nails Using Builder Gel?
Essential Items
- Nail primer
- Gel builder
- UV/LED lamp
- Nail file
- Fine buffer block
- Nail clip (optional)
- Cuticle remover
- Nail tips
- Alcohol
- Gel polish
Step-By-Step Instructions
Step 1: Prep Your Nails
Start filing the free edge of your nails using a fine grit file. While you’re at it, make sure you file out any rough edges. Keep in mind to go in one direction while roughing up your nails.
Follow with a fine grit buffer block to create a bit of texture to the nail surface by buffing lightly and gently. This helps improve adherence of the builder gel and nail tips afterward.
Use the cuticle pusher or press-on nail tip to push back the cuticle along the nail bed gently. You may also want to cut off any dead skin or hangnails. An e-file or cuticle remover is equally fine for this job.
Yet, beware that you need to be trained or at least have prior experience using e-file, or you might end up with painful or bloody nails with incorrect technique.
Next, clean the dirt and grime by rubbing your nails with alcohol. Be prudent in this step since any residues can cause lifting issues afterward.
This step is crucial, especially for those with very oily nails. Human nails have the ability to produce natural oils, which can impair the sticking strength of the builder gel and thus, lead to premature lifting.
For this reason, soak a cotton pad with rubbing alcohol and wipe down your nail beds to remove any excess oil.
Keep this step right before you get into “the thick of things”, so the nails can be in their bestest condition for primer and gel to hang on strong.
Step 2: Choose The Correct Size Of Nail Tips
Nail tips come in various shapes and sizes, and you’ll need to make sure it fits nice and comfortably on your natural nails. The nail tips should sit flush up against the edges, not show any gaps, and never go beyond the cuticles.
If the tips are smaller than the natural nails, they will be susceptible to lifting and popping off prematurely.
Get a nail that is in-between sizes? Then grab the slightly bigger one. In this case, plenty of filing and re-shaping needs to be done for a seamless fit; otherwise, the nail tips might not even make it into the first week following the application.
Here’s how to file and re-shape the nail tips:
- Gradually file down the tip from the side
- Gently shape the cuticle
- Buff the tip in an upward direction until you achieve a nice finished edge
- Apply the nail tip on top of your natural nail. If it’s still not a good fit, shape the tips after checking the shape. Make sure you keep re-checking the shape frequently to avoid overfilling.
- Once done, lay out the tips in the right order for easy application afterward.
Step 5: Apply The Primer (Optional)
Further, prepare the nail surface by applying your primer of choosing. Primer will remove any remaining grease on the nails, prevent bubbles from forming, help with the adhesion and prevent lifting.
Drop a small amount of the primer and allow time for it to settle and spread over the entire surface. It’s best to use a brush to distribute the liquid evenly.
Be extra careful as you don’t want the primer to come into contact with the side walls and cuticles due to its corrosive, burning and drying effects.
Allow at least 30 seconds for the primer to dry. It’s worth mentioning that primer overusing the product can cause lifting, which will defeat its initial purpose in the first place.
Step 6: Apply The Builder Gel To Your Natural Nails
Here comes the best part! Brush a thin layer of builder gel onto each of your natural nails.
Make sure the entire nail surface is covered with the product by rotating the nails so you can get a full view to cover every crook and cranny. Cure for 10 seconds under a UV/LED lamp.
Step 7: Apply The Builder Gel On The Nail Tips
Apply the gel to the inside of the nail tips. While you’re at it, you should not be heavy-handed at the base of the tips. If you put too much gel on this section, you’ll flood your cuticles.
Next, apply the entire surface of the fake tip to the natural nail. Carefully push the tips down into the assigned nails at a 45-degree angle.
The tips should first land at the cuticles before moving towards the ends of the nails. Proceed at a slow pace so that the gel can properly fill the space between the tips and your actual nails.
If you notice any bubbles, remove the tips and start it again! It is also important to remove any excess gel polish before curing.
Step 8: Flash Cure The Tips
Hold the nail with your fingers and flash-cure it for 20-30 seconds under the lamp. You do not want to skip this step as it temporarily adheres to the tips of your nails and allows you to attach all the tips to one hand.
Step 10: Re-shape And Apply The Polish
It’s worth noting that your extensions won’t look flawless at this stage! So, it pays to remove any tacky glue residues left behind from your nails.
As mentioned, use the cotton ball soaked with alcohol and wipe off the top surface and the underside of the nails.
Also, do some re-shaping as you wish to guarantee the nail is straight and the edges look finished and nice. Give your nails a nice buff to remove shine and adjust the shape to your liking further.
If you want to put on a polish or nail art, remember to gently rough up the nails with a file and clean off the dust with alcohol beforehand.
Once the nails are cleaned and ready, apply the first coat of gel polish and cure 30 seconds. Continue with the second coat and cure the nail for another 30 seconds. Finish with a top coat and cure for 60 seconds.
Step 11: Apply A Dehydrator And Cuticle Oil
The two last steps are to improve the look of the nails and restore moisture balance.
Apply a small amount of dehydrator to a lint-free wipe and gently scrub over the top of the nails to wipe off any sticky residue. Once you finish, use cuticle oil to restore hydration to the nails.
How To Remove Builder Gel For Nail Extensions?
As discussed, builder gel is a soak-off formula and should not be a hassle to remove. Yet, to keep you on the right track, here are essential steps to remove builder gel properly:
Essential Items
- Pure acetone
- Cotton pads
- Aluminum foils
- Low grit nail file
- Nail buffer
- Cuticle oil
- Cuticle pusher
- Heat pack (optional)
Step-By-Step Instructions
Step 1: File Off The Nail Extension
Use a low grit nail file to remove the nail extension as much as possible.
Using an e-file will certainly be less time-consuming for the job; however, we only recommend it to those with proper training and experience in using the tool.
Step 2: Remove The Top Coat And Color Coat (If There’s Any)
File the top coat and color coat layers with a hard grit nail file. Be careful and gentle as you do not want to take away the natural nails and damage the nail beds.
Step 3: Soak The Cotton Pads With Acetone
Divide the cotton pad into four small pieces before pouring some pure acetone. Then, place these pads onto the nails and ensure they cover the entire nail surface.
Step 4: Place The Aluminum Foils
Wrap each nail with a small aluminum foil, with the top folded to keep them in place.
Normally, you can get away with any aluminum foil. However, if possible, it’s best to use hairdressing foils thanks to their thickness and ease of control while on your fingers.
Step 5: Put On A Heat Pack (Optional)
Placing a warm heat pack on the tips can help save you the time it takes for the gel to soften.
Step 6. Wait For The Acetone To Soak Through The Gel
Allow around 10-15 minutes for the acetone to work.
Step 7: Remove The Builder Gel
Unwrap the foils and pads. Visually inspect if the gel has softened. If the gel slides easily, you can use the cuticle pusher to scrape it off from the nails.
Otherwise, soak the nails and repeat this step until the gel product is completely removed.
Step 8: Apply The Cuticle Oil
You’ve exposed your nails to acetone for quite a while, and your nails are sure to be stripped of much of their natural oils. Thus, it’s worth applying quality cuticle oil to your nails to provide them with the much-needed oils and moisture.
3 Other Alternatives To Nail Glue
Whether nail glue is not your adhesive of choice, or you do not have it in stock at home, here are three solid substitutes for nail glue that you can use for different purposes:
Nail Tabs – Best For Ease Of Use
Adhesive nail tabs are the easiest to find and -use in the market. They are made of double-sided tape and used in place of nail glue for press-on nails. These tabs come in different sizes to easily choose the right fit for your nails.
Many press-on nail kits often include nail tabs and nail glue so the consumers can have more choices while doing their manicures.
Advantages
- Easy To Use And Remove
The best thing about tabs is that they are easy to apply. Nail tabs are more gentle as no chemicals are involved in the making, so you can apply it using your bare hands without worrying about any damage. There is also no sticky residue as you would with either nail glue or builder gel.
Start with tearing off the tab and press it over the nail plate to secure it in place. Next, simply remove the other protective film on the top and immediately stick apply the fake nail. Use your finger to press it on for 30 seconds.
They are also a breeze to take off if you want to change your press-ons. Soaking your nails in warm soapy water for 1-2 minutes is all that it takes to remove these adhesive tabs.
- Does Not Ruin The Press-Ons
This adhesive does not damage the press-on nails after being removed, which means that if you wish to reuse your false nails for the next time, nail tabs are the way to go. Typically, press-ons can be re-worn at least five times.
Disadvantages
- Too Weak For Nail Tips
Nail tabs are not destined for nail extensions of any length. They do not offer enough strength for the tips to hold onto, and thus, your false nails will pop out in the wink of an eye!
- Short-Lived
On the downside, we only recommend adhesive tabs for short wear. They only last for a limited time (around 48 hours).
All the tabs are not highly durable since you’ll find them come off when they come into contact with water or with rigorous activities.
Therefore, nail tabs would make a good choice if your profession does not allow fake nails, but you still want gorgeous nails on occasion. However, nail glue would not gain the upper hand for its durability for long wear.
Check out this video by Nails with Courtney Crosbie for a tutorial on how to apply press-ons using nail tabs:
Acrylic Mixture – Best For Durability
Acrylic mixture combines polymer powder and monomer liquid at a correct ratio, which can be used both on press-ons and fake nail tips.
The main advantage of this option is that acrylics are very durable, and you can see your false nails make it well to the third week (before you need to get them filled or removed).
For these reasons, acrylics are a better choice for those after a long-lasting manicure or who often have their nails exposed to water and high temperatures.
Nail acrylics are also an alternative for people who show allergic reactions to ingredients in nail glue.
Advantages
- Extremely Durable
Thanks to the chemical makeup, acrylics are intrinsically durable. Press-ons or extensions using acrylic mixture can be good for as long as three weeks or beyond as long as you maintain them properly.
- Long-Lasting
Compared to other nail techniques, acrylics really shine when it comes to holding up against external impacts such as water, heat, or pressure.
This makes acrylic mixtures a great choice for those who know they’ll be rough on their nails due to their professions or lifestyles.
- Versatile
Acrylic mixtures can be applied on either full-covered press-ons or artificial tips. This is good news if you find yourself frequently switching up between these types of manicures but do not want to use nail glue!
Disadvantages
- Requires Skills To Apply
It takes trial and error to apply since you have to work to the recommended mixing ratio so that the mixture won’t be too thick or runny. There is no mixing involved with nail glue, so you are saved from some elbow grease!
- Complicated Removing Process
Acrylics need to be soaked in pure acetone for at least 10 minutes to resolve, which can be a hassle for some people.
- More Damaging On Nails Than Nail Glue
Acrylic mixtures contain harsh chemicals, and this can wreak havoc on the nails beds while they are on. Poor application and removal are also one of the biggest causes of the damaged nail bed.
The use of acetone in the removing process only adds up to the toll. All of these can leave you with weak, peeling, and painful nails.
The damages can even persist after the removal for quite a while, and there’s a lot of work to do to restore your natural nails to health.
To mend the damaged nails, it is important to apply cuticle oil such as argan or rosehip oil or hand lotion due to the drying effect of acetone.
A nail strengthener such as OPI Original Nail Envy Nail Strengthener can help nurse your nail back to health within 4 weeks of application.
- More Costly
Compared with other alternatives, such as nail tabs, acrylics are more expensive.
Typically, you can get your hands on a good pack of adhesive tabs for no more than $10, while a decent DIY acrylic kit from familiar brands can set you back no less than $30.
Here’s how to use acrylic mixture to adhere fake nails to your nail beds – a video by Self Care with Bee
Gel Polish – Best For Transparent Press-Ons
Gel polish can be an option for adhering to the press-on nails. However, it’s only ideal for clear or transparent false nails. The reason is quite simple! The gel polish needs to come into contact with UV light to get cured and hardened.
If the press-ons lack transparency, the light cannot pass through it to the gel. The result is that the gel polish is only partially cured or not cured at all, which means that the press-ons cannot stay on your natural nails.
For the most part, gel polish cannot outcompete nail glue as an adhesive. It only lasts for 1-2 weeks, compared with a professional-grade nail glue that can be good for 2-3 weeks.
That said, it still makes a viable substitute for nail glue for transparent press-on nails, whether you only need short wear or you get caught halfway through the manicure!
Conclusion
One of the many advantages of builder gel is its strength to shape nail extensions of any length, with either forms or tips. For this type of manicure, builder gel is more than capable of being used in place of nail glue.
Can you use builder gel as nail glue? We hope you can answer the question after finishing this article! Also, there are some great substitutes for nail glue, depending on different purposes, for you to consider whenever nail glue is not an option!
Leave a Reply